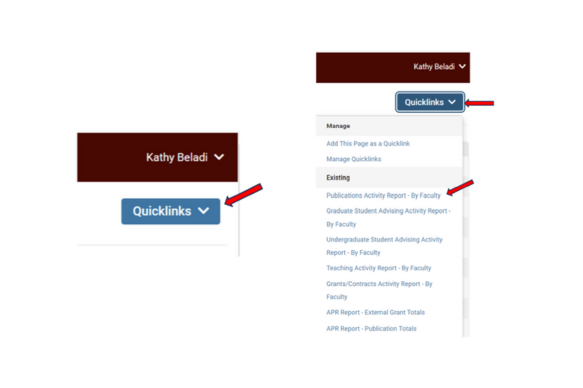
- Publications Activity Report ‐ By Faculty
- Graduate Student Advising Activity Report ‐ By Faculty
- Undergraduate Student Advising Activity Report ‐ By Faculty
- Teaching Activity Report ‐ By Faculty
- Grants/Contracts Activity Report ‐ By Faculty
- APR Report ‐ External Grant Totals
- APR Report ‐ Publication Totals
Step Three - Building the Report
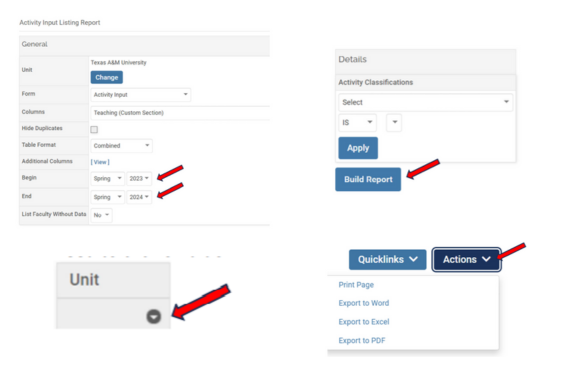
After selecting a Report, be sure to select the Begin and End dates for your report. Then click the “Build Report” button. It may take a couple of minutes for the report to load. It should then show you all of your active faculty who taught during that timeline.
- It should then show you all of your active faculty who taught during that timeline. You may also need to click on a down button in the “Unit” column to show all of your faculty.
- If you click on a blue number link, it will give you more details about those areas as well. The top row are the totals for the department.
You can also export the data by clicking on the “Actions” button in the upper right‐hand corner of the screen. The data shows best in Excel. Please note that it will only download the data that is showing on the screen.
Step Four - Academic Program Review (APR) Data
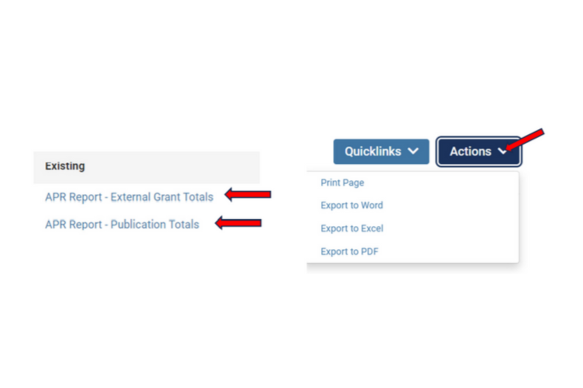
To view information that can be used for APR, click on the “Quicklinks” button to get the drop‐down list. Click the Quicklink for either “APR Report – External Grant Totals” or “APR Report – Publication Totals”.
- After selecting the Report, in the “General” area, you can edit the Begin and End dates of the information you need for your report as well as the Display Mode. The Display Mode is currently set to “Total” to pull the total counts on the dollar amounts for the Grants (or “Counts” for the Publications report). The default on the “Faculty” area is set to Spring 2024. If you need to go back further to collect information on some faculty who are no longer here or retired, you can adjust the Begin semester date. You can also change the “Activity Classification” if other types of information are needed.
- Then, click the “Build Report” button to pull the data.
You can also export the data by clicking on the “Actions” button in the upper right‐hand corner of the screen. The data shows best in Excel.
Step Five - Managing Quicklinks
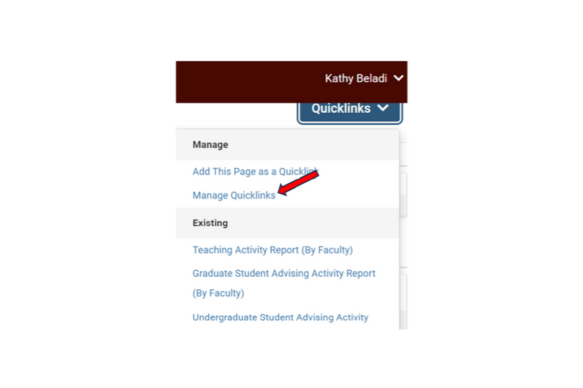
To Manage your Quicklinks, just click on the “Manage Quicklinks” button in the Quicklinks bar.
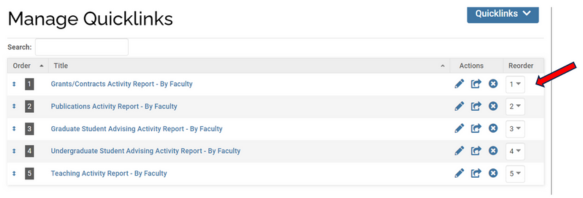
You can change the order of your Quicklinks, remove, add, or share Quicklinks. (pictured below)
- To change the order of the Quicklinks, choose the number in the Reorder column.
- To delete click the “x” icon.
- To share the Quicklink, click the arrow icon.
- To edit the name of the Quicklink, click the pencil icon.
